
OpenFaaS is a platform for “Serverless Functions Made Simple”. The official definition explains OpenFaaS as such:
OpenFaaS makes it easy for developers to deploy event-driven functions and microservices to Kubernetes without repetitive, boiler-plate coding. Package your code or an existing binary in a Docker image to get a highly scalable endpoint with auto-scaling and metrics.
OpenFaaS is completely Open Source, and is the brain-child of Alex Ellis (Twitter), who is the Director of OpenFaaS Ltd, and works on the project fulltime. You can support Alex via GitHub Sponsors here.
In this post I’m going to go through the basic steps for getting OpenFaaS setup for local development, writing your first function, and then go over the steps to deploy that function to the OpenFaaS Community Cluster.
Pre-requisites
You’ll need the following in order to follow along with this tutorial:
- Docker - Docker Desktop is available here for Mac & Windows
- Git
- A terminal - Bash, Zsh etc. If you’re running on Windows you can use the Windows Subsystem for Linux!
- kubectl - Available via homebrew on MacOS, and the Powershell Gallery on Windows. See the link for further installation instructions.
Install OpenFaaS
To deploy and test your functions locally, you’ll need to run an instance of the OpenFaaS gateway, along with a back-end provider, on your local machine. The simplest way to do this is via k3d, a lightweight Kubernetes distribution that runs in a single container on your local machine. To install k3d run:
curl -s https://raw.githubusercontent.com/rancher/k3d/master/install.sh | bashNow create a cluster:
k3d create
export KUBECONFIG="$(k3d get-kubeconfig --name='k3s-default')"
To install OpenFaaS to your k3d cluster, start by cloning the https://github.com/openfaas/faas-netes repo:
git clone https://github.com/openfaas/faas-netes.git
cd faas-netes
Install the namespaces:
kubectl apply -f namespaces.ymlThis will create two namespaces in your cluster:
openfaas- Which will hold the OpenFaaS cluster services (AKA. ‘Control Plane”).openfaas-fn- Stores the functions you deploy to OpenFaaS.
Create a password for the OpenFaaS Gateway and add it as a secret into the cluster. The below commands will generate a random password and add the secret:
# Generate a random 40 character password
export PASSWORD=$(head -c 12 /dev/urandom | shasum| cut -d' ' -f1)

# Add password as a Kubernetes secret in the openfaas namespace
kubectl -n openfaas create secret generic basic-auth \
--from-literal=basic-auth-user=admin \
--from-literal=basic-auth-password="$PASSWORD"
Now deploy the OpenFaaS stack:
kubectl apply -f ./yamlImportant: The YAML installation is only recommended for local development, for deployment into a production environment it is recommended you use the Helm installation detailed here
Install the faas-cli
The next step is installing the faas-cli. If you’re on MacOS and already have homebrew install then installation is as simple as:
brew install faas-cliFor manual installation, you can use the following command:
curl -sSL https://cli.openfaas.com | sudo shNote: You can run the above script without sudo, but further steps will be required.
Configure faas-cli & Login to the OpenFaaS Dashboard
Configure the faas-cli to use your local OpenFaaS cluster by using the faas-cli login command. If running k3d you’ll need to forward the gateway service port and set the OPENFAAS_URL environment variable:
kubectl port-forward svc/gateway -n openfaas 31112:8080 &
export OPENFAAS_URL=http://127.0.0.1:31112
echo $PASSWORD | faas-cli login --password-stdin
Open a browser and navigate to http://localhost:31112 to load the UI. The UI will prompt for a username and password. The default username is admin and the password is the one you specified in the deployment instructions above, you can print this to your console using echo $PASSWORD.
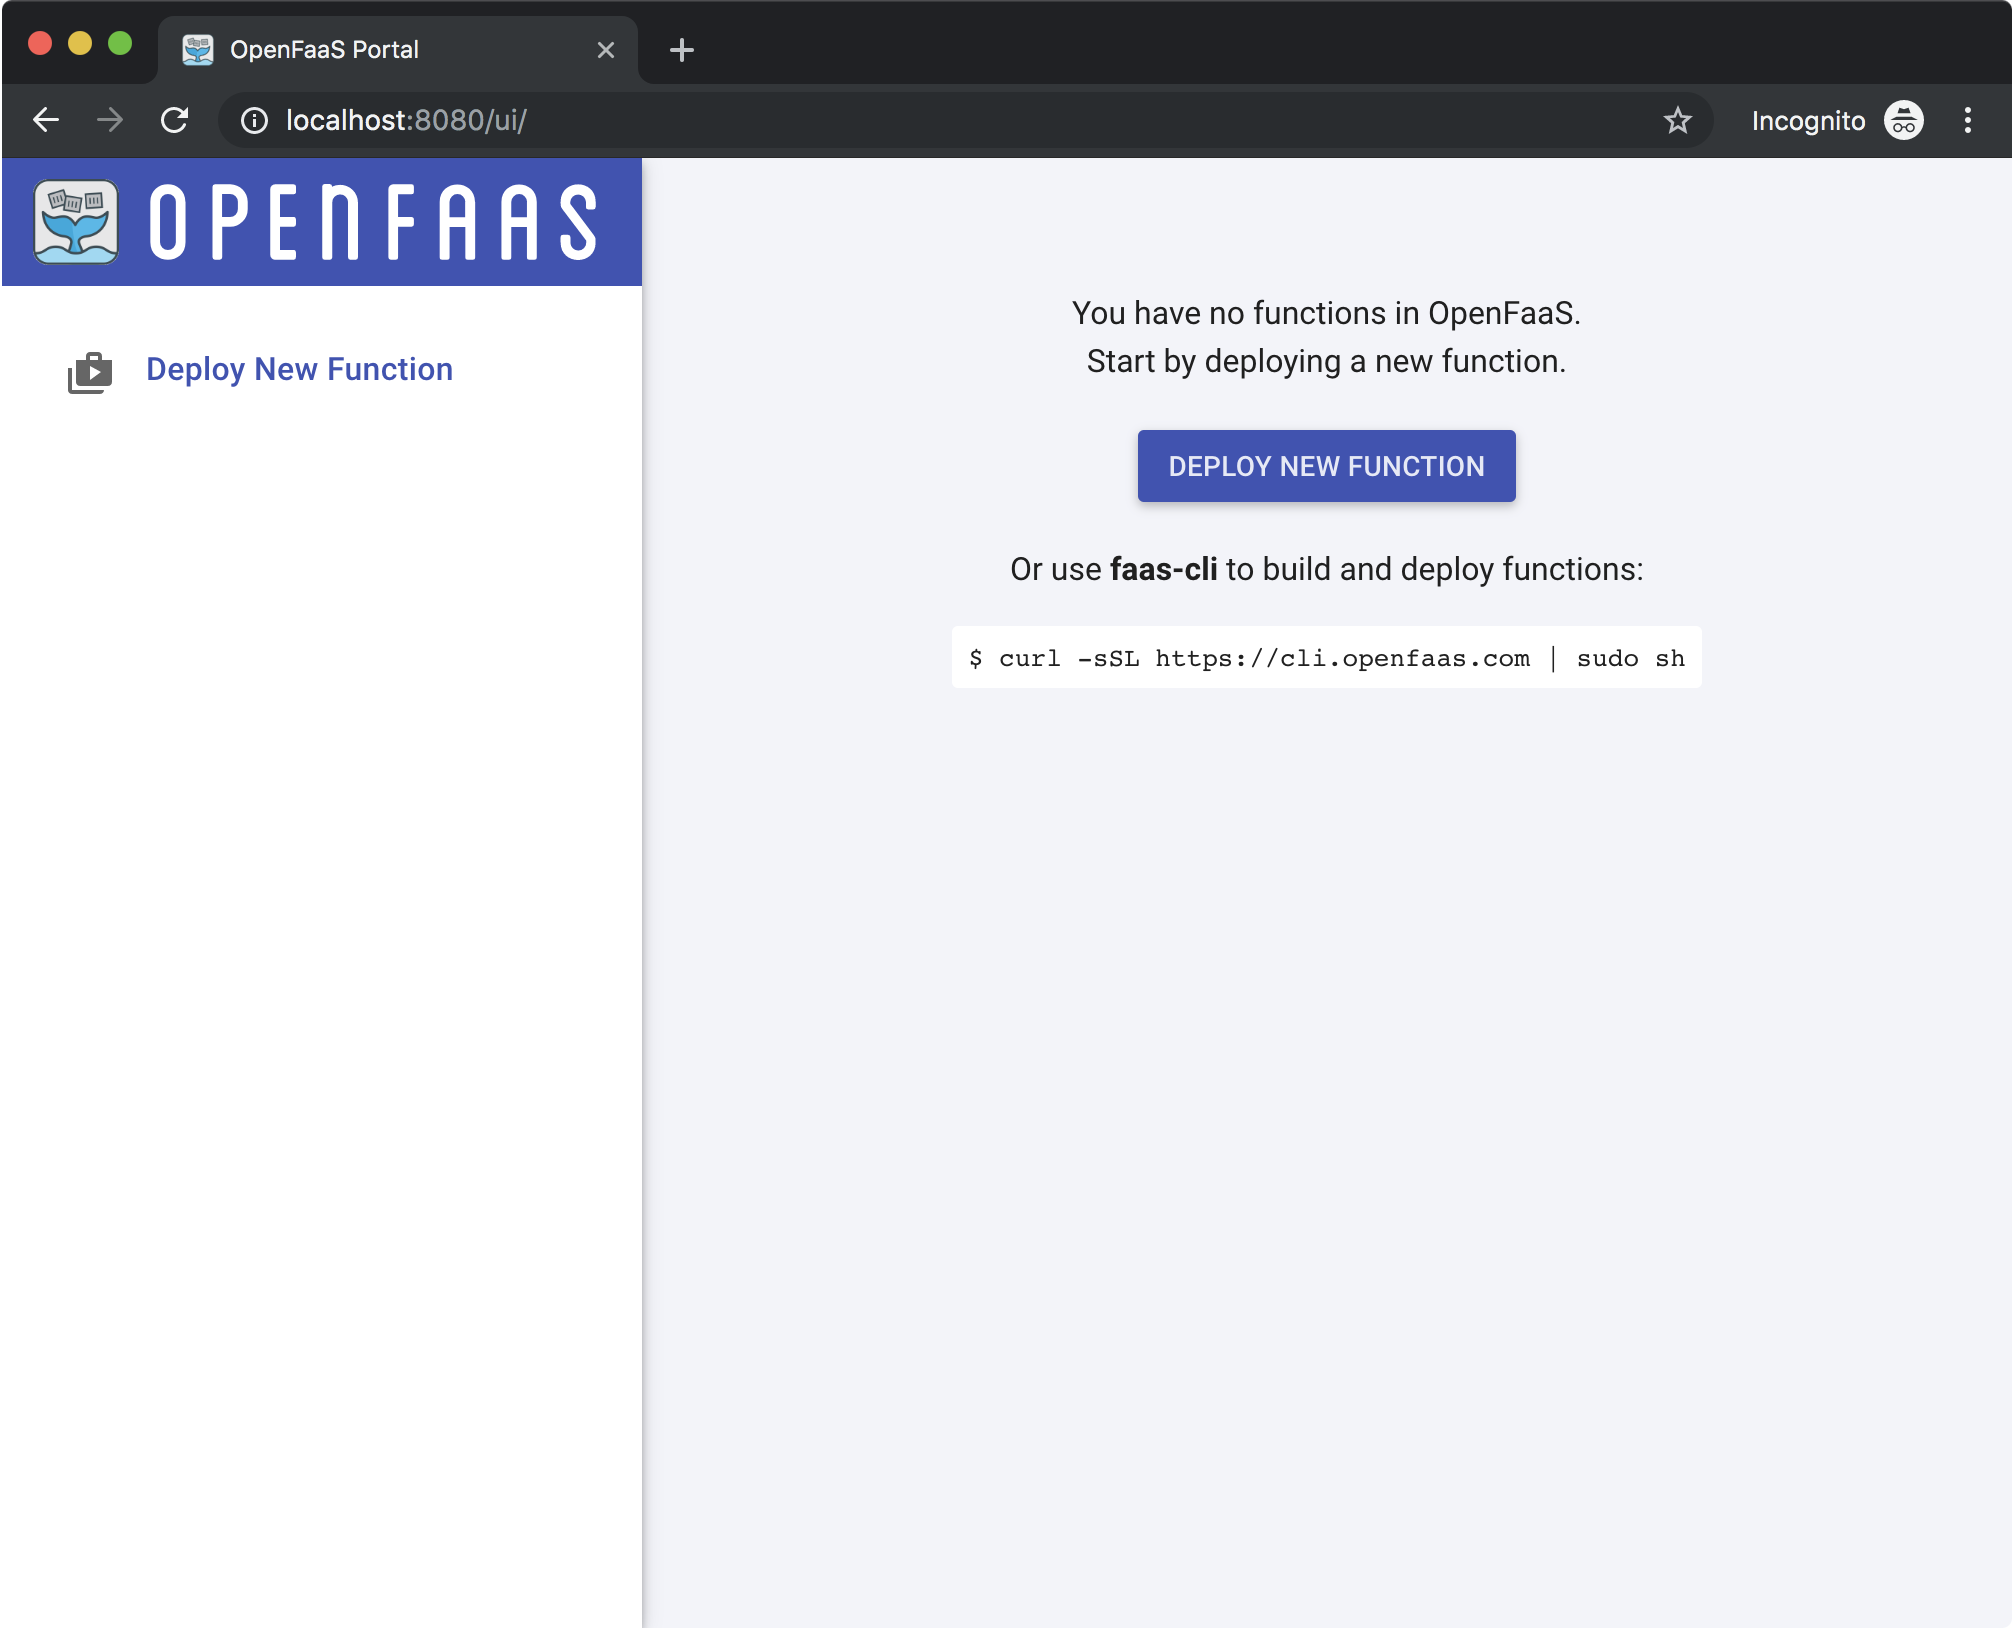
You can try various functions from the OpenFaaS ‘store’ from within the UI. For example:
- Click the “Deploy New Function” button.
- Search for “Dockerhub Stats” and click it.
- Click “Deploy”.
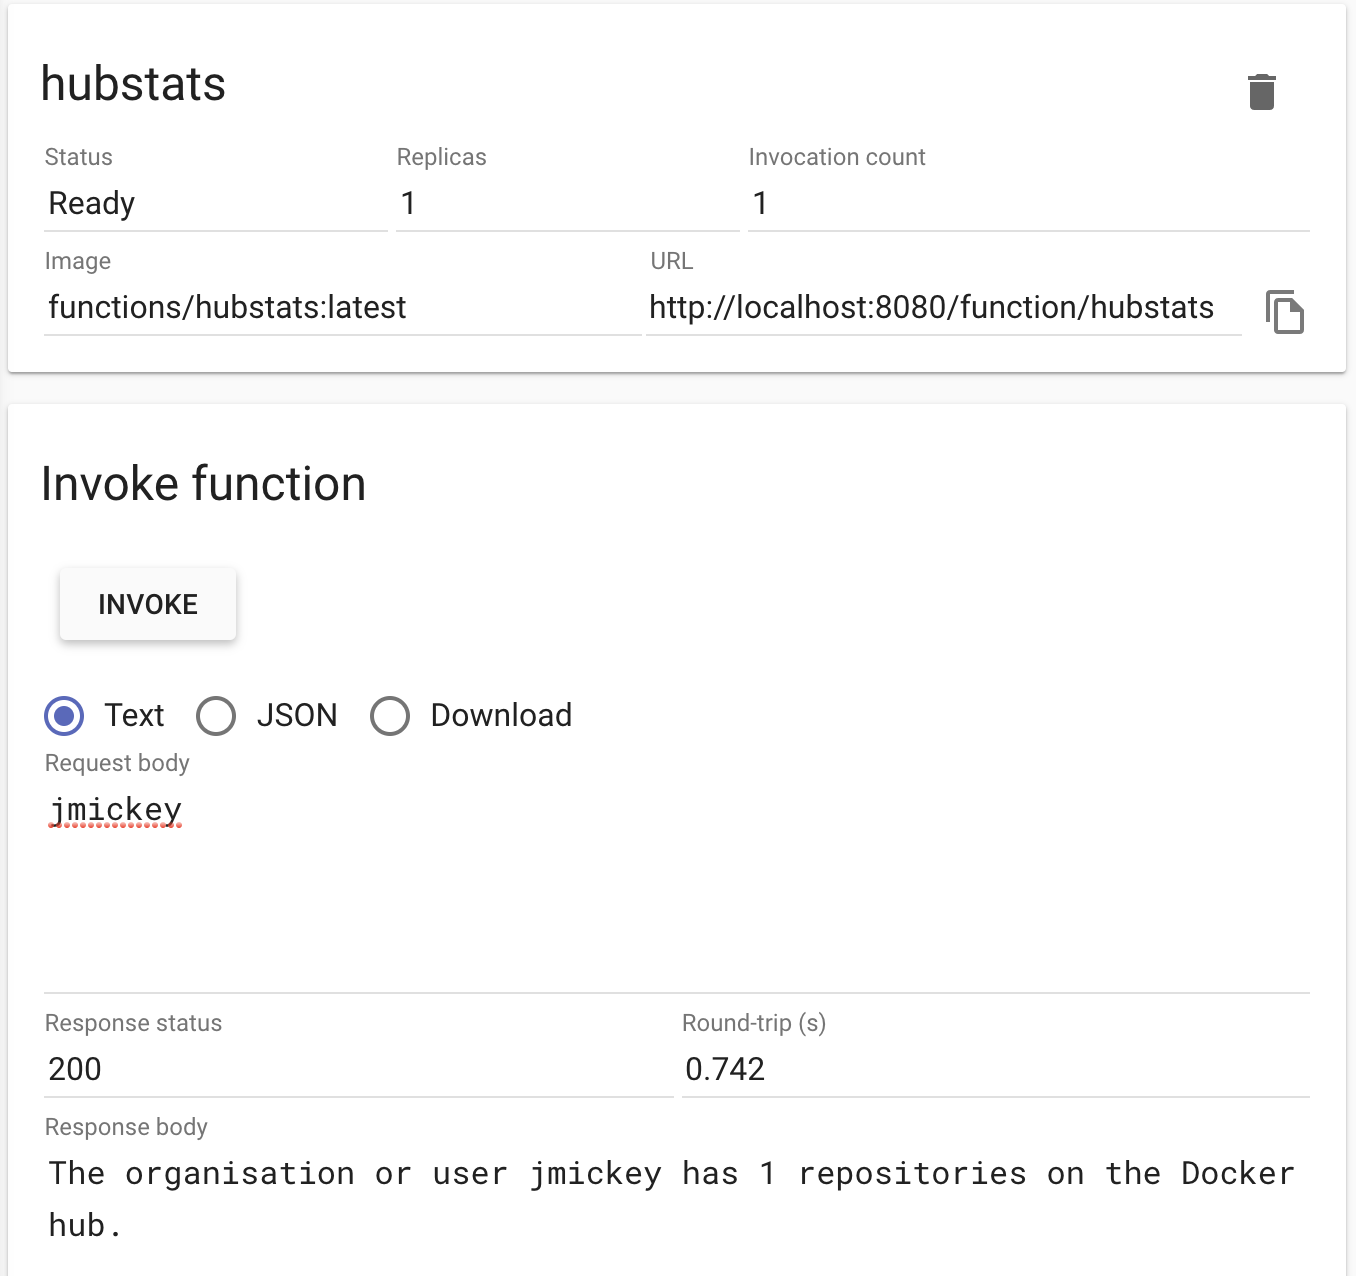
The function should appear on the menu on the left, click it, and wait for the status to change to “Ready”. Then enter your GitHub username in the “Request Body” field and click Invoke. At the time of writing this my main GitHub user account only has a single image uploaded to Docker Hub:
Creating Your First Function
Create a new directory in a location of your choosing called openfaas-functions, and change into that directory from your terminal. This is the directory that your function code will live inside.
OpenFaaS provides a variety of templates to help you get started. These templates can be listed using the faas-cli:
faas-cli template store listYou should receive an output similar to the following:
NAME                     SOURCE             DESCRIPTION
csharp                   openfaas           Official C# template
dockerfile               openfaas           Official Dockerfile template
go                       openfaas           Official Golang template
java8                    openfaas           Official Java 8 template
node                     openfaas           Official NodeJS 8 template
php7                     openfaas           Official PHP 7 template
python                   openfaas           Official Python 2.7 template
python3                  openfaas           Official Python 3.6 template
ruby                     openfaas           Official Ruby 2.5 template
node10-express           openfaas-incubator Node.js 10 powered by express template
ruby-http                openfaas-incubator Ruby 2.4 HTTP template
python27-flask           openfaas-incubator Python 2.7 Flask template
python3-flask            openfaas-incubator Python 3.6 Flask template
python3-http             openfaas-incubator Python 3.6 with Flask and HTTP
node8-express            openfaas-incubator Node.js 8 powered by express template
golang-http              openfaas-incubator Golang HTTP template
golang-middleware        openfaas-incubator Golang Middleware template
python3-debian           openfaas-incubator Python 3.6 Debian template
powershell-template      openfaas-incubator Powershell Core Ubuntu:16.04 template
powershell-http-template openfaas-incubator Powershell Core HTTP Ubuntu:16.04 template
rust                     booyaa             Rust template
crystal                  tpei               Crystal template
csharp-httprequest       distantcam         C# HTTP template
vertx-native             pmlopes            Eclipse Vert.x native image template
swift                    affix              Swift 4.2 Template
lua53                    affix              Lua 5.3 Template
vala                     affix              Vala Template
vala-http                affix              Non-Forking Vala Template
quarkus-native           pmlopes            Quarkus.io native image template
perl-alpine              tmiklas            Perl language template based on Alpine image
node10-express-service   openfaas-incubator Node.js 10 express.js microservice template
Lets use the golang-http template. Pull the template:
faas-cli template store pull golang-httpYou can now create a new function based on the template using the faas-cli new FUNCTION_NAME --lang LANG_NAME command:
faas-cli new helloworld-go-http --lang golang-httpYou should now have the following files within the directory
helloworld-go-http/handler.go
helloworld-go-http.yml
.gitignore
Take a look at the helloworld-go-http/handler.go file, and edit it slightly to contain the following:
package function

import (
    "fmt"
    "net/http"

    "github.com/openfaas-incubator/go-function-sdk"
)

// Handle a function invocation
func Handle(req handler.Request) (handler.Response, error) {
    var err error

    message := fmt.Sprintf("Hello %s", string(req.Body)) // Edit this line

    return handler.Response{
        Body:       []byte(message),
        StatusCode: http.StatusOK,
    }, err
}
Your function will also be specified in the helloworld-go-http.yml file:
version: 1.0
provider:
    name: openfaas
    gateway: http://127.0.0.1:8080

functions:
    helloworld-go-http:
        lang: golang-http
        handler: ./helloworld-go-http
        image: helloworld-go-http:latest
There are a few key elements to take note of and understand here:
gateway: Specified the remote gateway. For local development you will use the local gateway you deployed earlier via Docker Swarm. This can be overridden in CI via the--gatewayflag, or theOPENFAAS_URLenvironment variable.functions: A map of your functions. Right now you’ll only have one function specified here, but you can add more to this later.lang: The language as specified when you ranfaas-cli new --lang.handler: The folder that contains yourhandler.gofile. This can be changed if you want to give the handler a different name.
Time to deploy your function to the local Docker Swarm environment. You can choose to build and push your function in separate steps, but the easiest way to deploy your function is to use the following command:
faas-cli up -f helloworld-go-http.yml --skip-pushThe faas-cli will now build your function (in a Docker container) and deploy it to our local cluster. The --skip-push flag will prevent the faas-cli pushing the built container to the Docker Hub, which it will normally do by default.
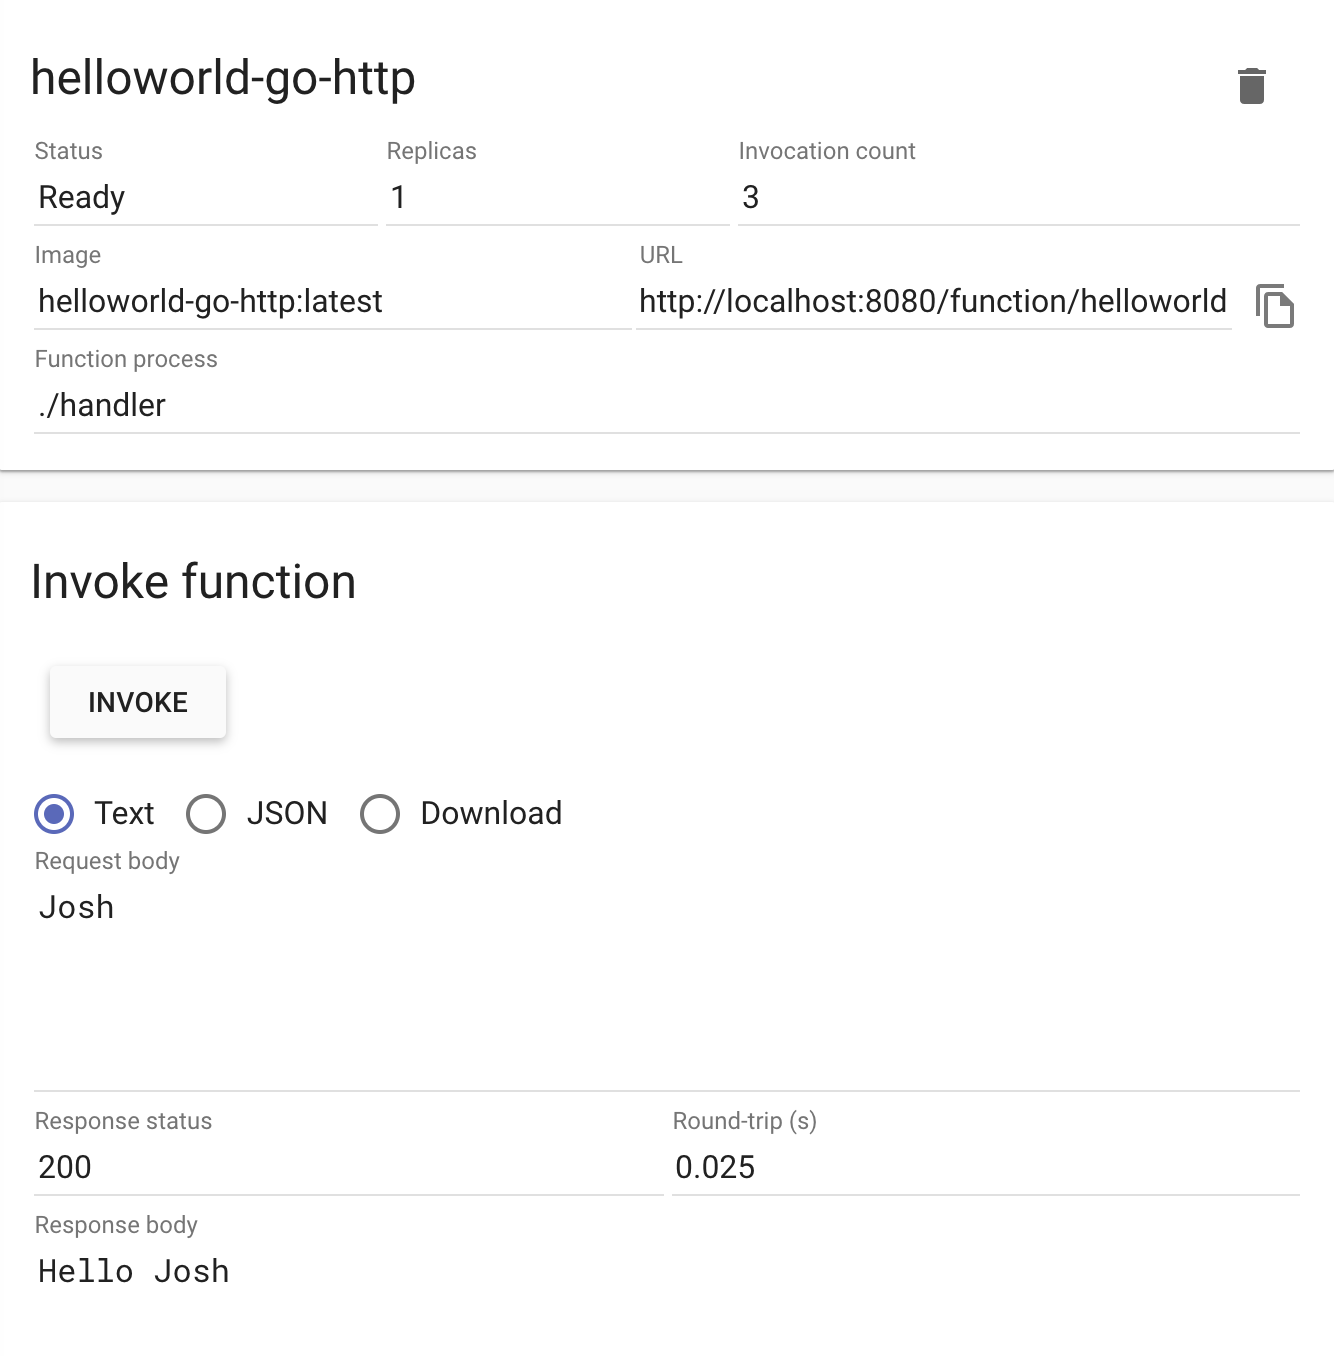
Once the deployment is completed navigate to the OpenFaaS UI in your browser (http://localhost:8080) and you should now see the helloworld-go-http function available in the sidebar. Click it and enter your name into the Request Body and click Invoke. Hopefully you should receive a response that looks something like this:
Add a Second Function
OpenFaaS allows you to add additional functions to the same directory and YAML file, which means you can deploy multiple functions together. Add a second function, this time using the Nodejs template:
# Pull the nodejs template
faas-cli template store pull node
# Create a new function and append it to the existing YAML file
faas-cli new helloworld-node --lang node --append helloworld-go-http.yml
You will now have an additional folder in your openfaas-functions directory called helloworld-node. The directory structure should look something like this:
.
├──
├── helloworld-go-http
│   └── handler.go
├── helloworld-node
│   ├── handler.js
│   └── package.json
├── helloworld-go-http.yml
└── .gitignore
Your helloworld-go-http.yml will also have changed slightly and should look similar to this:
version: 1.0
provider:
    name: openfaas
    gateway: http://127.0.0.1:8080
functions:
    helloworld-go-http:
        lang: golang-http
        handler: ./helloworld-go-http
        image: helloworld-go-http:latest
    helloworld-node:
        lang: node
        handler: ./helloworld-node
        image: helloworld-node:latest
Follow the instructions from earlier in the tutorial for deploying the functions to your local OpenFaaS cluster and notice how the dashboard has changed. Try invoking your new function!
Deploy to the OpenFaaS Community Cluster
To begin using the OpenFaaS Community Cluster you’ll need to read the Terms & Conditions and apply for access via this Google Form. Once your access has been approved then continue to follow the instructions on this page.
Once your PR to the CUSTOMERS file has been merged create a new GitHub repo called openfaas-functions and add the Community Cluster GitHub App and select the openfaas-functions repository.
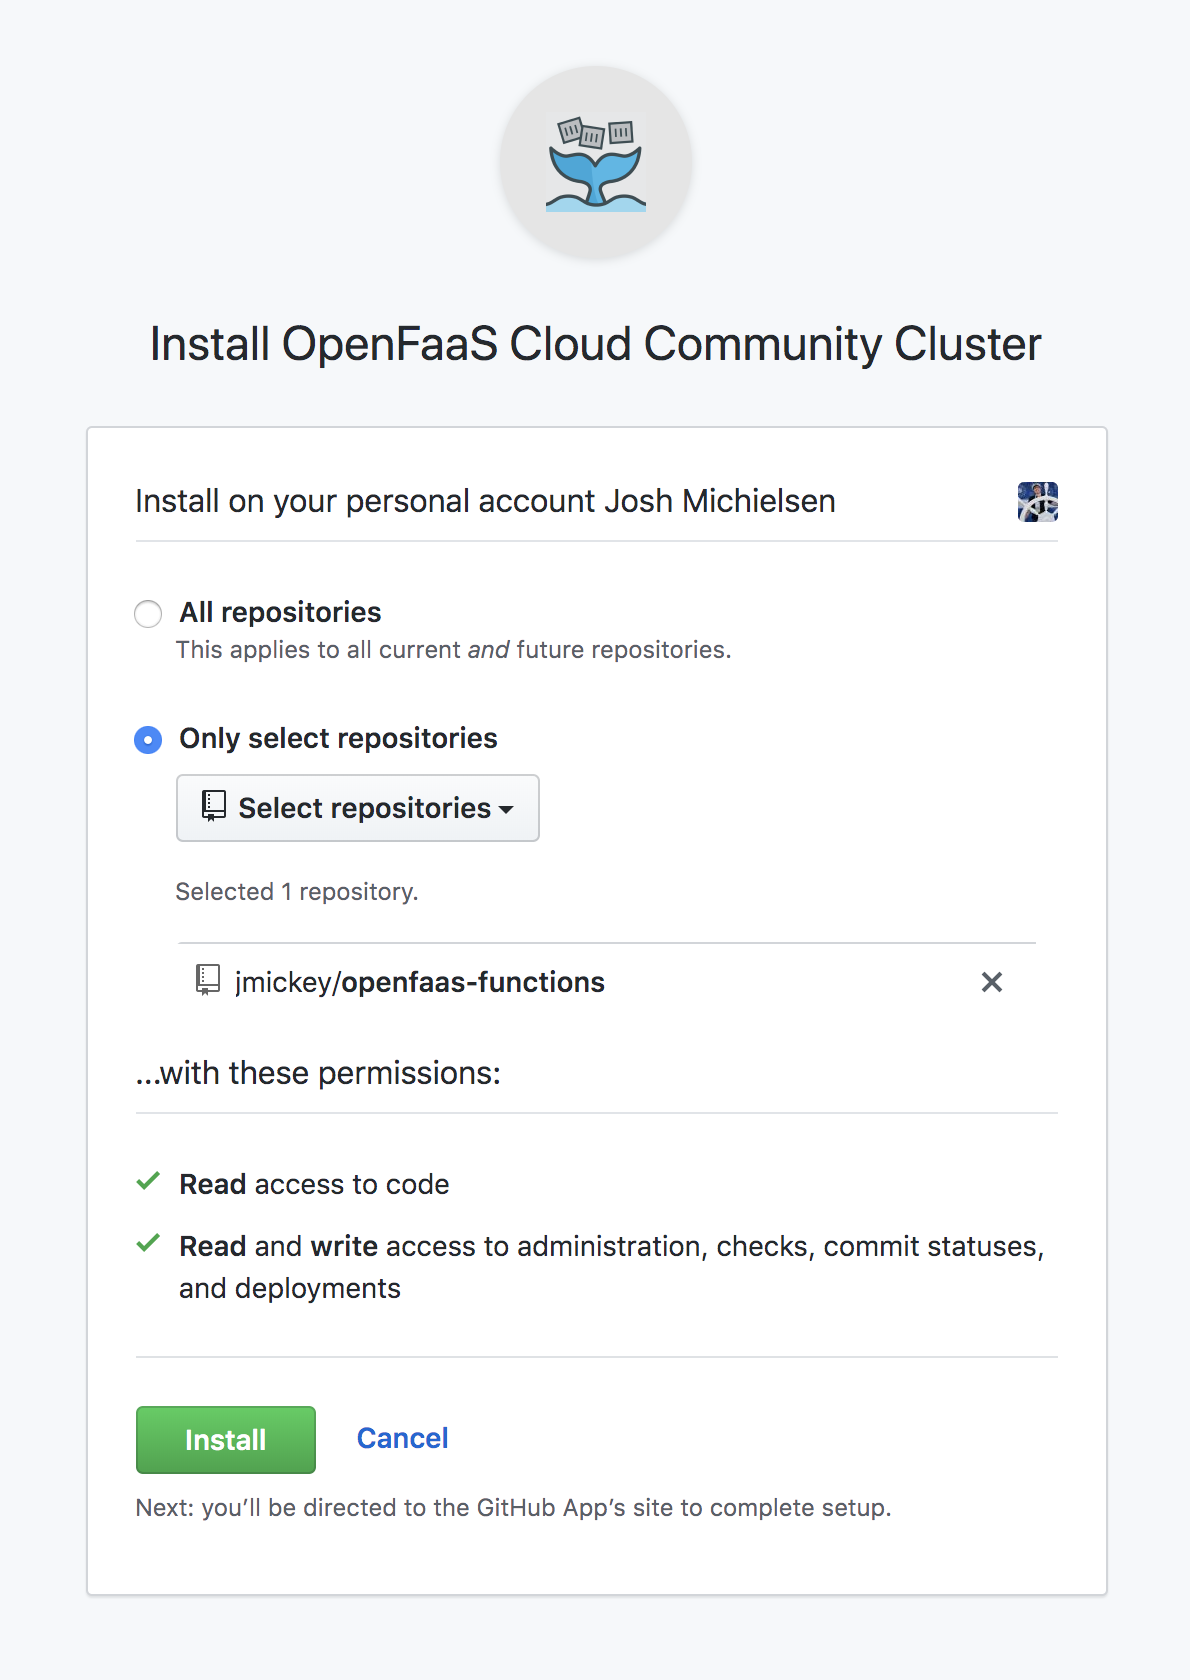
Return to your terminal, ensuring your in your openfaas-functions folder. You’ll need to run a few commands before pushing the code to GitHub:
# Rename your .yml file to stack.yml
mv helloworld-go-http.yml stack.yml

# Init the local repo
git init
# Commit the files
git add -A && git commit -m "First function commit"
# Add the rempte repository
git remote add origin https://github.com/<your-github-username>/openfaas-functions.git
# Push to the remote repo!
git push origin master
Navigate back to your GitHub repo and should see an orange dot indicator next to the latest commit information signifying that a task is being run:


Clicking the indicator will display a summary of the tasks that have been run and their respective statuses:
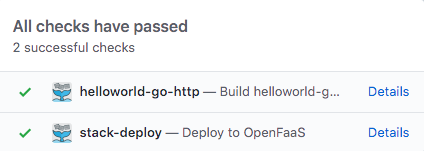
Click “Details” next to helloworld-go-http. This page will display build logs and a public link in which you can invoke the function in the form of https://<github-username>.o6s.io/<function-name>. Test the function via curl:
curl -d "World" https://<github-username>.o6s.io/<function-name>You’ve now successfully deployed your first function to the OpenFaaS Community Cluster!
Community Cluster Dashboard
The community cluster also comes with a built-in dashboard that displays read-only stats for your deployed functions. The dashboard address is:
https://system.o6s.io/dashboard/<github-username>You’ll need to authorise the OAuth login via GitHub before you can view the community cluster dashboard
The dashboard will allow you to retrieve your endpoint link and build logs, along with displaying invocation statistics for your function.
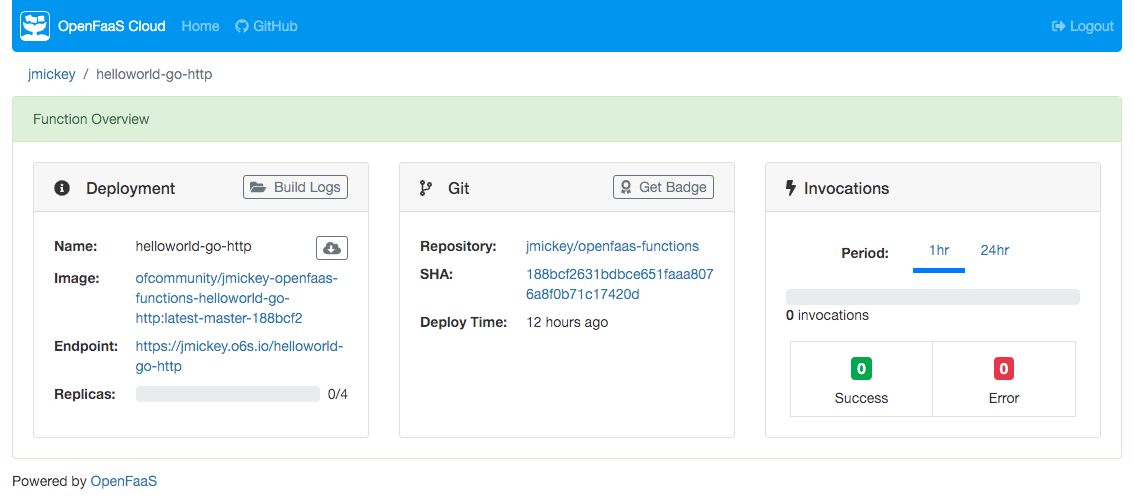
This post won’t go into finer details of the dashboard, but I encourage you to have a look around, and refer to the OpenFaaS Cloud docs if you want more information!
Cleanup
Cleaning up the installation of OpenFaaS running on your local machine is as simple as:
kill $!
k3d delete
This will kill the background kubectl port-forward process launched earlier, and remove the local k3d cluster along with all the OpenFaaS resources.
Next Steps
If you’ve enjoyed this introduction to OpenFaaS and the OpenFaaS Community Cluster then I highly recommend these next steps:
- Join the OpenFaaS Slack
- Read the OpenFaaS blog, and checkout the docs website
- Follow @openfaas on Twitter
- Complete the OpenFaaS Workshop
Thanks for reading this tutorial on getting started with OpenFaaS. I hope you found it helpful, and feel free to get in touch if you have any questions!